AWS Lambda function for Oracle database
Lambda function to connect and query oracle RDS database
This article will explain how to create a AWS Lambda function to connect to Oracle (RDS) database and query data.
Since lambda is based on linux environment its recommended to create this function on linux host. If you are using windows machine make use to WSL or VM or Docker.
Prerequisites:
👆 Download and keep it ready
Step 1: Check the python version installed
AWS Lambda supports Python version 3.6/3.7/3.8 at the time of this article written.
$ python --version
Python 3.8.11
Step 2: Install pip
$ sudo apt install python3-pip

$ pip3 --version
pip 21.1.3 from /usr/local/lib/python3.8/site-packages/pip (python 3.8)
Step 3: Install Virtual Python Environment builder
$ pip3 install virtualenv
Collecting virtualenv
  Downloading virtualenv-20.6.0-py2.py3-none-any.whl (5.3 MB)
     |████████████████████████████████| 5.3 MB 2.5 MB/s
Collecting distlib<1,>=0.3.1
  Downloading distlib-0.3.2-py2.py3-none-any.whl (338 kB)
     |████████████████████████████████| 338 kB 4.4 MB/s
Collecting backports.entry-points-selectable>=1.0.4
  Downloading backports.entry_points_selectable-1.1.0-py2.py3-none-any.whl (6.2 kB)
Collecting filelock<4,>=3.0.0
  Downloading filelock-3.0.12-py3-none-any.whl (7.6 kB)
Collecting platformdirs<3,>=2
  Downloading platformdirs-2.0.2-py2.py3-none-any.whl (10 kB)
Collecting six<2,>=1.9.0
  Downloading six-1.16.0-py2.py3-none-any.whl (11 kB)
Installing collected packages: six, platformdirs, filelock, distlib, backports.entry-points-selectable, virtualenv
Successfully installed backports.entry-points-selectable-1.1.0 distlib-0.3.2 filelock-3.0.12 platformdirs-2.0.2 six-1.16.0 virtualenv-20.6.0
WARNING: Running pip as the 'root' user can result in broken permissions and conflicting behaviour with the system package manager. It is recommended to use a virtual environment instead: https://pip.pypa.io/warnings/venv
/ #
Step 4: Create virtual environment oralmdfn
$ virtualenv oralmdfn
created virtual environment CPython3.8.11.final.0-64 in 688ms
  creator CPython3Posix(dest=/oralmdfn, clear=False, no_vcs_ignore=False, global=False)
  seeder FromAppData(download=False, pip=bundle, setuptools=bundle, wheel=bundle, via=copy, app_data_dir=/root/.local/share/virtualenv)
    added seed packages: pip==21.1.3, setuptools==57.1.0, wheel==0.36.2
  activators BashActivator,CShellActivator,FishActivator,PowerShellActivator,PythonActivator,XonshActivator
Step 5: Activate virtual environment
$ source oralmdfn/bin/activate
(oralmdfn) $

# you will see the virtual environment name in () if activated
Step 6: Install cx_Oracle module vai pip
Make sure you have downloaded the right version of cx_Oracle module. In this artical I use python 3.8 so i have downloaded cx_Oracle-8.2.1-cp38-cp38-manylinux1_x86_64.whl (👈cp38 is for python 3.8)
$ pip3 install cx_Oracle-8.2.1-cp38-cp38-manylinux1_x86_64.whl
Processing ./cx_Oracle-8.2.1-cp38-cp38-manylinux1_x86_64.whl
Installing collected packages: cx-Oracle
Successfully installed cx-Oracle-8.2.1
verify cx-Oracle installation
$ ls  oralmdfn/lib/python3.8/site-packages/cx*
oralmdfn/lib/python3.8/site-packages/cx_Oracle.cpython-38-x86_64-linux-gnu.so

oralmdfn/lib/python3.8/site-packages/cx_Oracle-8.2.1.dist-info
Step 7: Extract libiao rpm
Install rpm2cpio package on linux
$ apt-get install rpm2cpio

$ apt-get install cpio # use this command to install cpio if not installed

$ rpm2cpio lib64aio1-0.3.111-2pclos2020.x86_64.rpm | cpio -idmv
./usr/lib64/libaio.so.1
./usr/lib64/libaio.so.1.0.0
./usr/lib64/libaio.so.1.0.1
54 blocks
go to usr/lib64/
$ ls -l $PWD/usr/lib64/
total 32
lrwxrwxrwx 1 root root    15 Jul 15 02:01 libaio.so.1 -> libaio.so.1.0.1
-rwxr-xr-x 1 root root 13536 Sep 22  2020 libaio.so.1.0.0
-rwxr-xr-x 1 root root 13536 Sep 22  2020 libaio.so.1.0.1

$ rm $PWD/usr/lib64/libaio.so.1   ## to remove the soft link
$ cp $PWD/usr/lib64/libaio.so.1.0.1 $PWD/usr/lib64/libaio.so.1
Step 8: Create lambda function zip file
create a new directory
$ mkdir ora_lmd_fn_py38
copy files and folders as mentioned below
$ cp -rp oralmdfn/lib/python3.8/site-packages/cx_Oracle* ora_lmd_fn_py38/
$ cp -rp instantclient_18_5/* ora_lmd_fn_py38/
$ cp usr/lib64/libaio.so.1 ora_lmd_fn_py38/
finally copy this python script to the folder
$ cp oralmdfn.py ora_lmd_fn_py38/

$ ls ora_lmd_fn_py38/
BASIC_LITE_LICENSE                        genezi                 libipc1.so       libociicus.so     ojdbc8.jar
BASIC_LITE_README                         libaio.so.1            libmql1.so       libocijdbc18.so   oralmdfn.py
adrci                                     libclntsh.so           libnnz18.so      libons.so         ucp.jar
cx_Oracle-8.2.1.dist-info                 libclntsh.so.18.1      libocci.so       liboramysql18.so  uidrvci
cx_Oracle.cpython-38-x86_64-linux-gnu.so  libclntshcore.so.18.1  libocci.so.18.1  network           xstreams.jar
Step 9: Archive the ora_lmd_fn_py38 folder with zip
$ cd ora_lmd_fn_py38/
$ zip -r ora_lmd_fn_py38.zip *
$ ls -lh *.zip
-rw-r--r-- 1 root root 58M Jul 15 02:38 ora_lmd_fn_py38.zip
Since our zip file is more than 10MB we need to upload to S3 bucket to add it to Lambda
Step 10:
Following steps to be performed on AWS management console
Step 10.1:
Create S3 bucket and upload ora_lmd_fn_py38.zip file to it
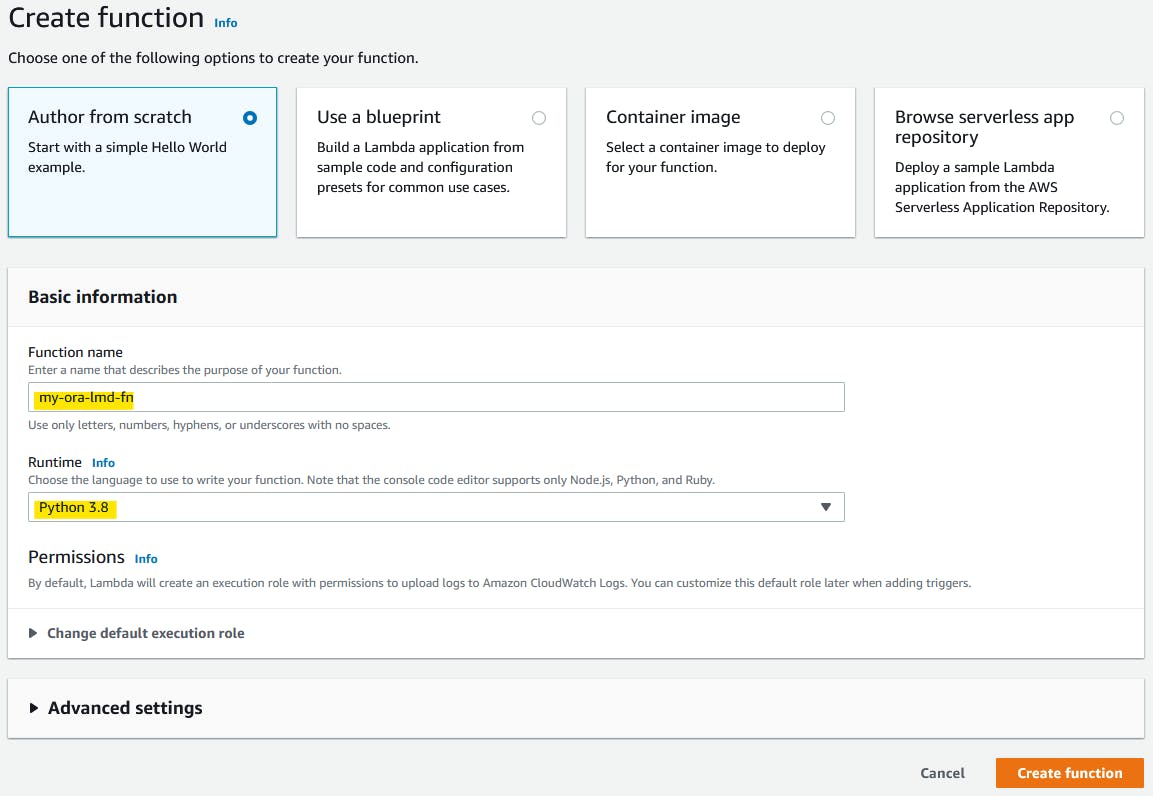
Step 10.2: Create a lambda function

Edit Handler as oralmdfn.lambda_handler (our python file name is oralmdfn and handler name is lambda_handler)

Step 10.3: Upload zip file from S3 to Lambda
Get zip file URI

Upload zip file to Lambda

Step 10.4: Test the code
On lambda page click Test button
Execution result: succeeded 👍

see Log output for query output
